FujiXfiles

FujiXfiles blog with tips & tricks and personal experiences with my Fujifilm X-Series cameras. Fuji X10, X100, X100S and X-Pro 1 and Fujinon XF 14mm f2.8, XF 18mm f2, XF 35mm f1.4 and Samyang 8mm f2.8 fisheye lenses.

Paris street photography - traveling X-Photographer style

Every time before I pack my travel photo bag, I try to envision what kind of photos I expect to take on location for the job or portfolio work. In my early days of photography I was prepared for every possible photo situation by bringing most of my gear. I recall one time where I lugged 20 kg (40 lb) of DSLR gear in a backpack through Paris. That was an awful experience!

Since my switch to Fuji X cameras 3.5 years ago, thankfully my travel photo bag has become a lot lighter. The night before this trip to Paris I decided on the following gear to bring:

- Fuji X100S

- WCL-X100 (wide conversion lens) for the X100S

- Fuji X-Pro 1

- Samyang 8mm f2.8 fisheye lens

- Fuji XF 14mm f2.8

That's 2 camera bodies plus 4 fast prime wide angle focal length weighing around 1.6kg (3.5 lb)!!! Add spare batteries and ND filters and you're still well below 2 kg (4lb) in your bag. That is only 10% of the weight of the gear that I took along a few years ago!

Paris streeet photography gear

My Paris streeet photography gear

Everything plus my iPad Air and battery chargers fit comfortably into my ThinkTank Retrospective 10 bag. With the small bag and photo gear there have been no hassles at airport security for me any more. A great way to start my trip quite relaxing despite the early red eye flight.

For my style of street photography I prefer wide angle lenses. I want to be close to the scene while still providing enough space around my subject to explain the situation to the viewer. In terms of 35mm film equivalent field of view I covered 12mm (8mm fisheye),  21mm (XF 14mm), 28mm (WCL-X100) and 35mm (23mm on X100S).

I stepped off the plane at Charles de Gaulle Airport with my X-Pro 1 + XF 14mm and X100S ready for action and right there was already my first frame to be captured. Always be ready is important in street photography!
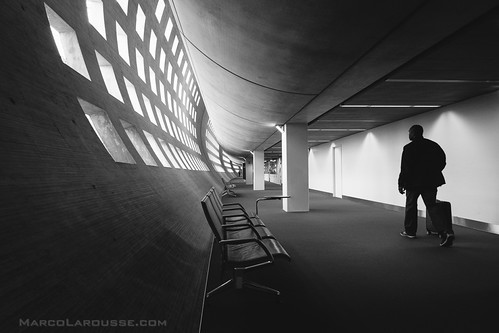
the lone traveler - Fuji X-Pro 1

The lone traveler - Fuji X-Pro 1

For a street photographer to start the day with a portfolio keeper is equivalent to an athlete who manages to get a great result in his first attempt. Unposed street photography is like a box of chocol... I guess you already heard that analogy too many times ;)

Off to downtown for breakfast and more street photography:
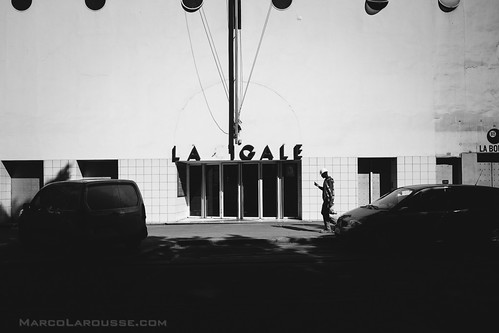
La Cigale Paris - Fuji X-Pro 1

La Cigale Paris - Fuji X-Pro 1

Bulldog roaming the city - Fuji X-Pro 1

Bulldog roaming the city - Fuji X-Pro 1

Comparing the Fuji X-Pro 1 autofocus to the improved AF on the X100S, the X-Pro 1 AF feels a bit long in the tooth now. While you can still get good results - especially when following some of

my AF tips from a previous post

- I really wish for a X100S or X-T1 style performance boost on Fujifilm's top of the line camera carrying the "Pro" in its name.
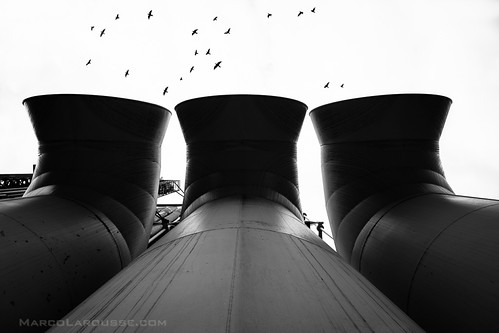
Industrial Bird Production - Fuji X-Pro 1

Industrial Bird Production - Fuji X-Pro 1

Don't ignore photo art - Fuji X-Pro 1
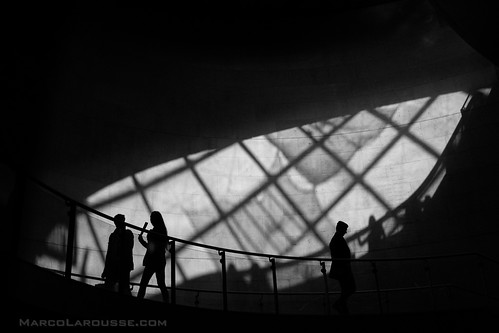
Don't ignore photo art - Fuji X-Pro 1

Shadow walk and talk - Fuji X100S
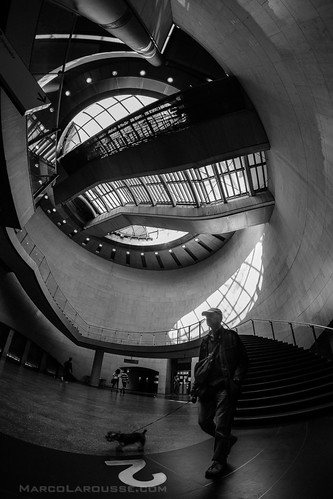
Shadow walk and talk - Fuji X100S

"2" - Paris Street Photography - Fuji X-Pro 1
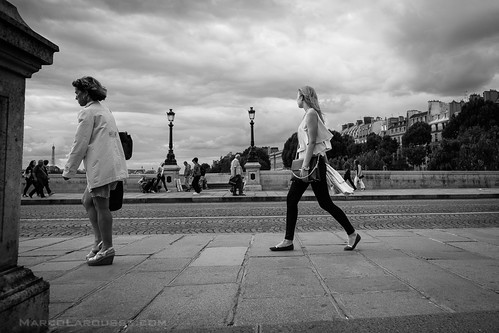
Paris is a giant catwalk - Fuji X-Pro 1

Paris is a giant catwalk - Fuji X-Pro 1

And while the X-Pro 1 AF is slower than the one on the X100S I still used the X-Pro 1 for most of my photos in Paris. The XF 14mm with it's 90° field of view feels very natural to me and it gives me enough surrounding environment of the scene to put my subject into a context - like the girl in the photo above looking at the Eiffel Tower in the background.
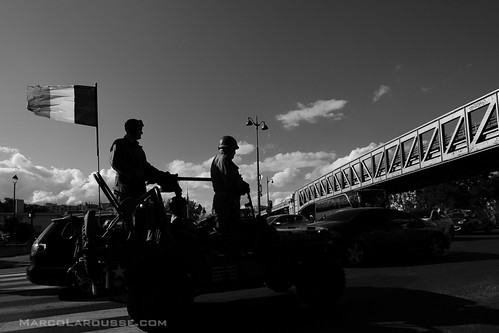
Victory anniversary celebrations Paris 2014 - Fuji X-Pro 1

Victory anniversary celebrations Paris 2014 - Fuji X-Pro 1

And the XF 14mm has the wonderful manual focus mechanism that allows me to zone focus the "traditional way" with the focus distance on the lens instead of the "virtual distance scale" in the viewfinder. This is a huge advantage and I really hope that future wide angle lenses (besides the XF 14mm and XF 23mm) and maybe even a future X100 will get this great feature, too.
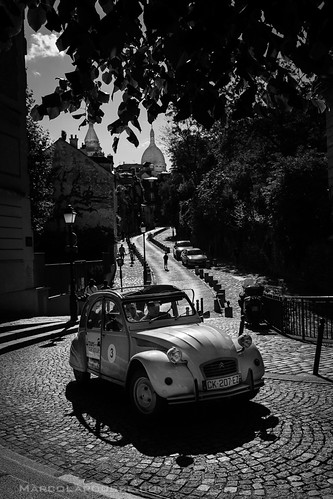
Cliché Citroën 2CV and Sacré-Cœur photo - Fuji X100S
Cliché Citroën 2CV and Sacré-Cœur photo - Fuji X100S

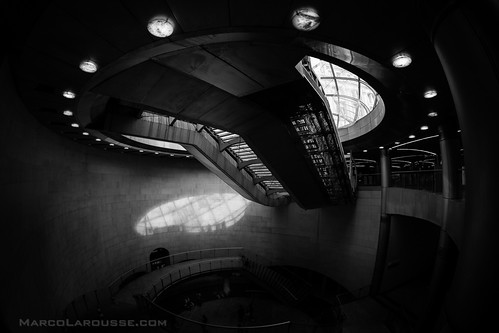
Spaceship hiding in a Paris metro station - Fuji X-Pro 1
Spaceship hiding in a Paris metro station - Fuji X-Pro 1

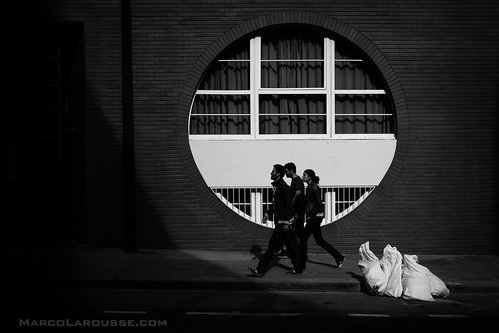
Circle of trust - Fuji X100S

Circle of trust - Fuji X100S

I went to Paris with a very light photo bag and only wide angle lenses. If I would go back tomorrow with a street photography assignment, would I pack differently? Not at all! It was very pleasant to move around freely with a light back and small unobtrusive and quiet cameras. And those are important requirements for successful street photography!

If you have any further questions or want to share your Fuji-X experiences just leave a comment below, Twitter me @HamburgCam or visit

my Homepage at www.MarcoLarousse.com

And if you liked my post I am always happy if you spread the word and retweet, like or google +1 it :-)

Fuji X10 and Firmware 2.0 Review and Samples

One thing I really enjoy since I started using Fuji X cameras is that Fuji listens to us users and pushes out Firmware updates over time that don’t only improve speed and reliability, but also add features.

I have been enjoying the use of my Fujifilm X10 as my most compact “serious“ camera. I always take it along when I only have a coat pocket of space for a camera and I’m always amazed by the quality images I get from this small sensor camera. The awesome fast lens does work perfectly together with the EXR sensor. But the fast zoom lens comes at the price of a little bit bigger size. Unlike a Canon s95/S100 who’s lens retracts 100% into the body to give a small package that fits in your shirt pocket, the lens of the X10 sticks out too much for any shirt pocket that I own. But my coat pockets will hold the X10 comfortably.

I just returned from a 1 day business trip to Munich. I only had a little extra room in my bag and it was easily filled with the X10. Here are three quick photos that I snapped on the way:

As always, click on the image for a larger version

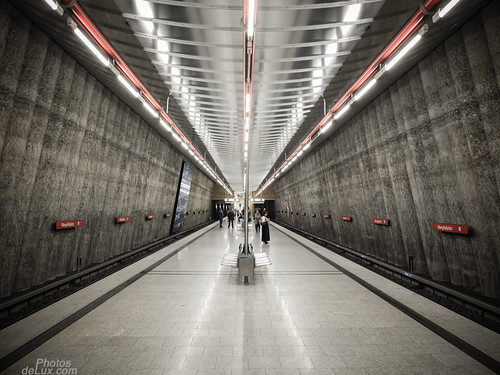
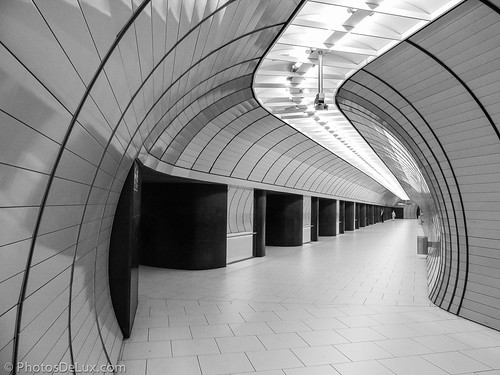
A cool looking subway station that is hidden in the south of Munich:

Spaceport Munich - Fuji X10 sample

And the very famous Marienplatz station that most Munich visitors come across:

Munich Marienplatz Station - Fuji X10 sample

The X10 has a great auto white balance even in this tricky yellowish airfield lighting and very good ISO 1600 quality for a small sensor camera

Fuji X10 ISO 1600 AWB sample

Fuji X10 ISO 1600 AWB sample

___________

Firmware 2.0

Last Friday my almost one year old Fuji X10 received a 2.0 firmware update from Fuji. Two things were mentioned as changes in the release notes:

1. The “Q“ (Quick) Menu that I love so much on my X-Pro 1 was added to the X10 “RAW“ button. You now have the camera’s most important functions all on one detailed screen to quickly change them.

2. An “Advanced Filter” function has been added. Those filters can be activated in the Advanced Mode and give you the choice of 5 special filter effects (Toy Camera, Miniature, Pop Color, High-Key, Dynamic Tone and 6 individual color key (partial color) filters.

I have spend some time over the weekend to play with the new firmware functions. The added “Q“ Menu alone made the upgrade worth it for me. Although you need to be aware that you loose the option to program the “RAW“ key with a custom function. The Fn key can still be programmed with you favorite function, though.

The color filters are a nice add on, too. But to be honest, I’m not a big fan of these filters in general. I do, however, see why Fuji added them to the prosumer targeted X10 compact. The X10 is a very capable compact camera. And I enjoy the excellent image quality and natural color rendition of the original files straight out of the camera. But there are users who prefer a different style of look to their images that had to be applied outside the camera in a photo editor, untill now.

But now you can choose the filter style you like in the Advanced menu and preview the effect the filter will create live on the LCD. One click and the image has been captured in that style and is ready for upload via USB, SD-Card reader or Eye-Fi card.

Here are some examples of what some of the filters look like (out of camera):

The Miniature filter:

Fuji X10 Miniature filter sample

Fuji X10 Miniature filter sample

The Dynamic Tone filter:

Fuji X10 Dynamic Tone filter sample

Fuji X10 Dynamic Tone filter sample

The Partial Color Blue filter:

Fuji X10 Partial Color Blue filter sample

Fuji X10 Partial Color Blue filter sample

And the High-Key filter:

Fuji X10 High-Key filter sample

Fuji X10 High-Key filter sample

While it is convenient to have the camera bake the filter style automatically into your photo there is a drawback. Once the JPG is created, there is no turning back! The effects only work in JPG and don't work on your RAW files. So there is no way to neutralize your image file after the filter style has been applied. Therefore use the filter effects wisely!

While I tested the filter effects, I started to wonder if their use could be improved. I came up with the following suggestions/questions:

1. Why can't the filter effects be created from a RAW file inside the camera's RAW converter like the film simulations?

2. Why can't the filter effects be incorporated into the "Drive" function "Film Simulation Series"? This way I could choose one or two effects and still have the original Provia file.

3. Why can't the filter effects be accesed in the "Q" menu for quick changing?Maybe Fuji listens once again to our suggestions - and please Fuji, add the "Q" menu to the X100's Raw button, too ;-)

If you have any further questions leave a comment below or Twitter me @HamburgCam

And if you liked my post I am always happy if you spread the word and retweet, like or google +1 it :-) 
How Bokehlicious is the Fuji X-Pro 1?

Tests have shown that the Fuji X-Pro 1 is able to challenge full frame sensor cameras in resolution, dynamic range and ISO performance.

But there is one physical limitation where even the best APS-C size sensor can't challenge a full frame camera - and that is shallow depth of field control.

Any sensor smaller than full frame will have a greater depth of field at comparable lens and f-stop settings. Now that does not automatically imply that this is a bad thing. Many wildlife, sports and macro photographers actually appreciate this characteristic for their work.

But I am a shallow depth of field and bokeh lover! I have used full frame DSLR's for 6 years and really make use of shallow depth of field to separate my subject from the background. So how can I create this effect with the X-Pro 1?

Well, the underlying physics of the X-Pro 1 APS-C sensor can't be changed. You have to a) shoot as wide open as possible and b) get as close as possible to your subject and c) use the longest focal length possible in order to increase the shallow depth of field.

The bokeh quality is a matter of the lens used. So how do the XF 18mm and XF 35mm that I own do in the bokeh department? See and decide for yourself:

Small but at the Top - Fuji X-Pro 1 macro

The Fujinon XF 35mm f/1.4 is capable of producing a nice bokeh and lots of details even at f/2.8!

Happy Bokeh Friday 11.05.2012 - Fuji X-Pro 1

The Fujinon XF 18mm f/2 does produce a very pleasing bokeh, too.

Happy Bokeh Friday 30.03.2012

XF 35mm @ f/1.4 with sunlight coming in through the window behind the chair.

And let our grammar better get always ;) - Fuji X-Pro 1

This was a high contrast scene facing towards the sun with the XF 18mm lens. Blown highlights but nice bokeh.

Happy Bokeh Friday 20.04.2012

Detail of a classic Citroen DS taken with the XF 35mm f/1.4

Happy Bokeh Friday 13.04.2012

The wide angle XF 18mm f/2 allows for a good angle of view even if you want to get close to the subject in order to create background blurr

Happy Bokeh Friday 22.06.2012 - Fuji X-Pro 1

XF 35mm at f/1.4 - I use shallow depth of field to focus the viewers attention to the part of the picture that I want to highlight. The Lytro camera shown in this image lets the viewer decide where to focus on after the picture was taken...

The right one is somewhere out there... - Happy Bokeh Friday!

XF 35mm at f/1.4 - If everything would have been in focus, the background would have distracted from the subject and the story this picture was supposed to tell would have been less intense

Portrait in the rain - Fuji X-Pro 1

I am always amazed about how well the XF 35mm on the X-Pro 1 resolves details. Even wide open at f/1.4 you can clearly see individual hairs (click on the image to go to a bigger version)

Both the Fujinon XF 18mm f/2 and 35mm f/1.4 are great compact lenses that can be used with wide open aperture and still resolve lots of detail.

Remember, the smaller the sensor gets, the tougher it is to separate your subject from the background! Therefore a smaller m4/3 sensor needs an even faster lens to create a similar shallow depth of field at a comparable field of view that you get from an APS-C sensor camera.

Looking at Fujis XF lens roadmap, the XF 23mm f/1.4 and XF 56mm f/1.4 (both in 2013) are two lenses that look interesting for the shallow depth of field style photographer :)

And as the Fuji X-E1 hast the same mount and sensor as the X-Pro 1, the results will be the same.

If you have any further questions leave a comment below or Twitter me @HamburgCam

And if you liked my post I am always happy if you spread the word and retweet, like or google +1 it :-) 

Pimp my Fuji X-Pro 1

Don't worry! By pimping I don't mean that you need to add neon or a subwoofer to the X-Pro 1 ;)

When I say pimping I'm talking about what I did to increase speed and usability of my X-Pro 1.

1. Strap

The day I preordered my X-Pro 1 was also the day that I ordered a thin leather strap from

Gordy's Camera Straps

. I have used Gordy's straps on all of my old analog cameras for years. A beautiful camera like the X10, X100 or the X-Pro 1 deserves a beautiful strap. The strap is perfect for the weight of the camera and you can customized the length, color of leather and color of the wrapping cord to individulize your strap.

Fuji X-Pro 1 with Gordy's strap and soft release

2. Thumbs Up grip

Compared to an entry level camera body the X-Pro 1 is not that much smaller in width and height. But it's much thinner. That's great for portability but not ideal for ergonomics.

I have rather large hands and the X-Pro 1 is too thin to sit perfectly in my hand. Fuji was aware of this potential issue and offers a X-Pro 1 hand grip. The Fuji hand grip is screwed into the tripod mount of the X-Pro 1. It offers a centered tripod mount on the bottom (the X-Pro 1 comes with an off center tripod mount). I almost ordered the hand grip, but unfortunately it lacks the hole to access the battery and SD card compartment when attached. So you'll have to detach the hand grip every time you need to access the SD card or battery...

Then I read somewhere that a Thumbs Up grip for the Leica X1 fits the

Fuji X-Pro 1 (Thumbs Up CSEP-2) and the X100

. It was about 50% more expensive than the Fuji Hand Grip, but you still have easy access to the battery/SD door.

My black Thumbs Up grip arrived and has stayed on the X-Pro 1 since then. It is well made (as one can expect for this price) and fits ergonomically perfect for me. The camera is well balanced even when holding it in one hand. They now even make another

Thumbs Up (EP-7S)

grip especially for the X-Pro 1 that is a bit cheaper, but I have not tried that one.

If you opt for a Thumbs Up grip you should be aware of the following issues:

You loose the flash ability via hot shoe (I have not used a flash on the X-Pro 1 so far). And the paint of the grip will wear off quite easily and expose the brass underneath (see photo).

Fuji X-Pro 1 with Thumbs Up Grip CSEP-2 and soft release button

Fuji X-Pro 1 with Thumbs Up Grip CSEP-2 and soft release button

Fuji X-Pro 1 with Thumbs Up Grip CSEP-2 and soft release button

3. Soft release:

I found the X-Pro 1 trigger to be a bit small for my liking and I ordered a soft release online. There are cheap soft releases on ebay so give it a try. And maybe order a few extra ones as I have managed to loose one already. (I did not dare to add LocTite)

4. Extra battery:

 I ordered two original spare batteries for my X-Pro 1. I get around 300-400 images on one charge under my normal use conditions. So the extra juice can come in handy...

5

. SD-Card

If you want to speed up the operations on your X-Pro 1 invest in fast UHS-I SDHC cards! Fortunately Fuji supports the new UHS-I standard and the X10, X100 and X-Pro 1 make use of it. I am using 16GB SanDisk Extreme Pro cards rated at 95 MB/s and have never felt that the cameras operate slowly. The speed will most likely improve noticably even compared to a normal Class 10 card.

SanDisk Extreme Pro SDHC UHS-I

SanDisk Extreme Pro SDHC UHS-I

SanDisk Extreme Pro SDHC UHS-I

6. SD-Card maintanance

No matter what SD card you use there is some precaution that you should take with the cards used on Fuji X-Cameras!

First of all always format the card inside the camera.

Secondly, SD cards come with a little "Lock" slider on the side. Do make it a habbit to switch the slider to "Lock" as soon as you take the card out of the camera and unlock it only right before you put it back into the camera! (unless you want to load a firmware update onto the card).

If you don't lock the card and stick it into a Mac or iPad (I don't know about Windows), the OS will add a little file onto the card that gives your Fuji camera the hiccups. The camera will feel totally unrespondsive and takes forever to start. Only cure is to format the card in camera and remeber to lock it next time you take it out.

7. Lens adapter:

If you still have some old lenses from a different camera system why not check out if they have an adapter for the XF mount? I recently wrote about my experience with the

Canon EOS EF to Fuji XF adapter on my X-Pro 1

and will soon post about my experience with the Olympus OM Zuiko to XF adapter.

Give your lens a second life and your X-Pro 1 some extra focal lenght to play with :)

Fuji X-Pro 1 with EF 135mm f2 L

Fuji X-Pro 1 with Kipon EOS-XF adapter and Canon EF 135mm f/2 L lens attached

If you have any further questions leave a comment below or Twitter me @HamburgCam

And if you liked my post I am always happy if you spread the word and retweet, like or google +1 it :-) 

Fuji X-Pro 1 goes to Paris

Every year I try to go on a weeken trip with photographer friends. This year we decided on going to Paris. This wasn't our first trip to Paris so I have a pretty good comparison on my experiences from previous photo visits.

In the past I used to take a heavy full frame DSLR with a bunch of good lenses with me. It seems to me that the burden of owning great lenses is that you have to decide which lens to leave at home and what kind of graeat photo opportunities you might miss due to that.

Once I did lug most of my gear with me through the city all day long that I did realize that I missed more photo opportunities while changing lenses or due to the intimidation factor of the big camera and lens. So this year was the year to go light on gear and still bring back good photos!

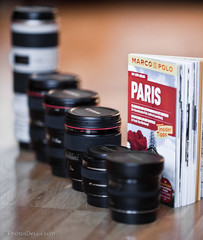
This was the lens line up I took along on my last trip to Paris:

Happy Bokeh Friday 17.07.09

And this was my gear I took along this time: Fujifilm X10 and X-Pro 1 (plus the Fujinon XF 35mm lens that was already packed in my jacket's pocket at the time I took this photo :-)

Happy Bokeh Friday 15.06.2012

My photographic mission on this trip was to use the X-Pro 1 for raw street photography. Henri Cartier-Bresson took many of his photos in Paris so this seemed like the perfect spot for me to give it a try. I converted most of these images from color into black & white in Adobe LightRoom 4.1

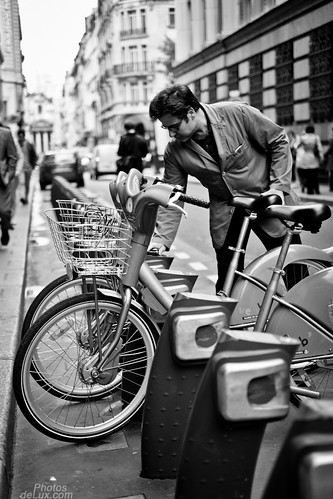
Paris Street Photography No.1 - Fuji X-Pro 1

It was really easy to go around take photos almost unnoticed with the small and unobtrusive X-Pro 1

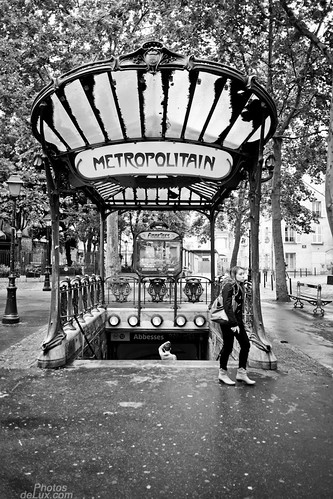
Paris Street Photography No.2 - Fuji X-Pro 1

Framing and timing shots was really easy as I saw people walking into the scene before they were in the frame - thanks to the rangefinder style viewfinder of the X-Pro 1

Paris Street Photography No.4 - Fuji X-Pro 1

I also found the color to black and white conversion to be quite eays in LR4

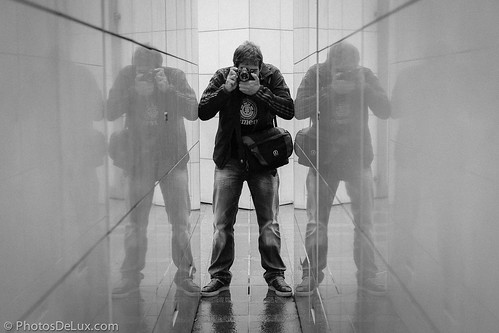
Paris Photographer Reflections - Fuji X-Pro 1

And just in case you are wondering, the X-Pro 1 is capable of color photos, too ;)

Paris from a tourists point of view - Fuji X-Pro 1

Over all the city travel and street photography experience with the X-Pro 1 was very pleasing. The weather ranged from rainy to sunny and hot and I only had a small and relatively light ThinkTank Retrospective bag with me all day. There were few occasions where I would have wished for a bit longer focal length, but on those occasions I pulled out the X10.

There's more to come from my Paris trip and I'll post some really cool Fujifilm X10 shots later...

If you have any further questions leave a comment below or Twitter me @HamburgCam

And if you liked my post I am always happy if you spread the word and retweet, like or google +1 it :-)